7 Tips to Sharpen Garden Power Tool Blades

Time:2026-10-23 Author:Sienna
0%

Sharp blades do more than improve a garden’s appearance. They reduce tearing, limit repeated passes, and help engines work under less strain. The U.S. Environmental Protection Agency’s nonroad equipment guidance links proper maintenance with cleaner, more efficient engine operation. That matters when a mower, trimmer, or hedge cutter runs beside dry grass and dusty paths.

The safety case is equally practical. The U.S. Consumer Product Safety Commission’s National Electronic Injury Surveillance System estimated roughly 80,000 lawn-mower-related emergency-department injuries in 2021. Many incidents involve contact with moving blades, thrown objects, or unexpected starts. Disconnect the spark plug or battery first. Wear cut-resistant gloves and eye protection. Secure the tool on a stable bench. Never trust the switch alone. The Outdoor Power Equipment Institute also emphasizes manufacturer instructions, blade inspection, and safe handling in its consumer safety guidance.

This guide explains How to sharpen blades of garden power tools through seven clear, field-tested tips. You will see how to identify a dull edge, remove packed debris, choose the correct file or grinder, and preserve the blade’s balance. A thin, bright edge is not automatically a good edge. I learned that the hard way after removing too much metal from one side; the tool vibrated noticeably afterward. Small mistakes matter. Check the manual, measure both sides, and stop when the blade cuts cleanly without becoming dangerously thin. The goal is controlled maintenance, not a mirror finish. Some tools also require professional service when blades are cracked, bent, or heavily corroded.
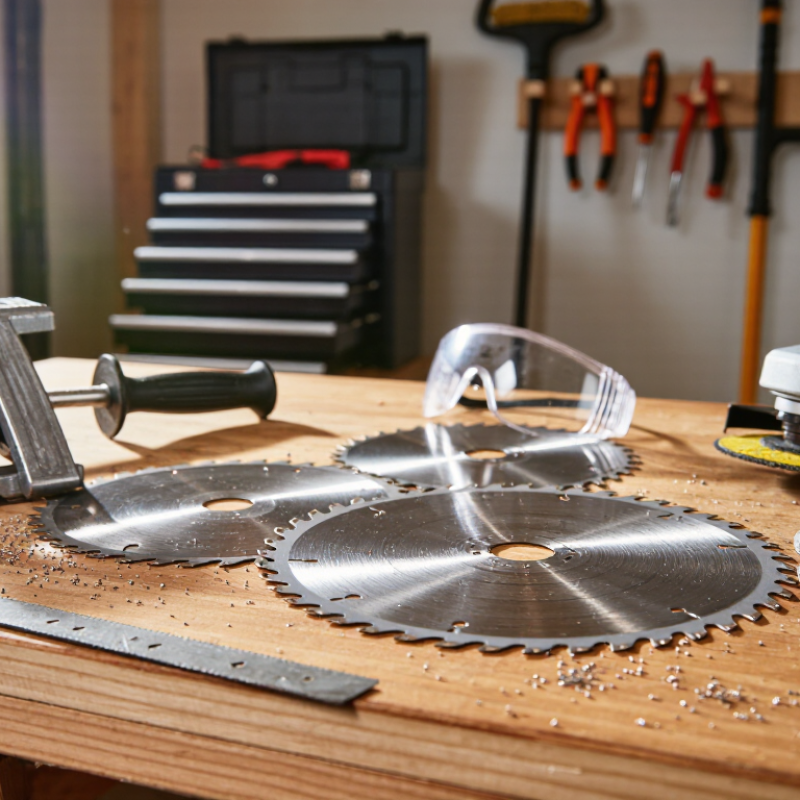
7 Tips to Sharpen Garden Power Tool Blades

Identify When Garden Power Tool Blades Need Sharpening

A dull garden power tool blade rarely announces trouble at once. Watch the cut, not only the blade’s appearance. Ragged grass tips, crushed stems, and torn hedge leaves often show that the edge has weakened. Freshly cut surfaces should look clean, not shredded. If the tool needs repeated passes, sharpening may be overdue.

Check for seven practical signs:

  • increased vibration
  • unusual noise
  • slower cutting
  • excessive pressure
  • uneven results
  • visible nicks
  • overheating

Stop the tool before inspecting it. Disconnect its power source, then wear cut-resistant gloves and eye protection. A blade that feels blunt can still cause injury. Never test sharpness with your finger.

I inspect the blade after removing soil and plant residue. Dirt can hide small chips, so cleaning comes first. Compare both edges under bright light. A dull edge usually reflects light as a thin, bright line. Deep dents or a bent blade need professional assessment, not aggressive filing.

I have sometimes sharpened too soon, wasting metal and changing the original angle. That mistake taught me to check performance twice. A simple paper test may help on some removable blades, but the manufacturer’s angle and maintenance instructions remain more reliable.

If the tool shakes after sharpening, stop using it and recheck balance, fasteners, and blade condition.

Gather the Right Tools and Follow Essential Safety Measures

Tip 1

Gather the right tools before touching the blade. Use safety glasses, cut-resistant gloves, a wire brush, a flat file, and a sturdy clamp. A sharpening guide can help maintain the original angle. Check the tool’s manual for its recommended angle and fastener settings. Never sharpen a blade while it remains attached to powered equipment. Disconnect the plug or remove the battery completely.

Tip 2

Secure the blade on a stable workbench. A loose blade can slide suddenly, even during gentle filing. Keep your fingers behind the file and push it away from your body. Remove dirt and dried sap with the wire brush first. This exposes cracks, dents, and uneven edges. I once rushed this cleaning step, and the damaged section was easy to miss. That mistake taught me to inspect twice.

Tip 3

Use controlled strokes and remove only a small amount of metal. Follow the existing bevel instead of creating a new cutting angle. If using a powered sharpener, avoid overheating the edge. Dip the blade in water when appropriate, and stop if the metal changes color. Wipe away filings before checking your work. The edge should look even, not mirror-perfect. Replace the blade if it has deep cracks, severe bends, or missing metal. Before reassembly, tighten fasteners securely and keep the first test gentle, away from people and pets.

Remove and Clean the Blade Before Sharpening

7 Tips to Sharpen Garden Power Tool Blades

Before sharpening any garden power tool blade, disconnect all power sources. Remove the battery or unplug the machine completely. For petrol equipment, let the engine cool and disconnect the spark plug wire. Wear cut-resistant gloves and safety glasses. I once rushed this step and nearly handled the blade by its cutting edge. That mistake was unnecessary.

Tip: Photograph the blade before removal. This helps you restore its original position and direction. Use the correct wrench, then place the blade on a wooden workbench. Do not drop it onto concrete. Brush away grass, sap, and packed soil with a stiff nylon brush. A damp cloth can remove loose dust. For stubborn residue, use a small amount of suitable degreaser and follow its safety instructions.

Tip: Inspect the cleaned blade under bright light. Look for cracks, deep grooves, bent sections, or missing metal. Cleaning can reveal damage that sharpening cannot fix. I sometimes focus too much on creating a sharp edge. That is not enough. A damaged blade may need professional assessment or replacement.

Let the blade dry completely before sharpening. Moisture and leftover grit can interfere with a file or sharpening stone. Mark one cutting edge with a pencil if both sides look similar. This small detail reduces confusion during reassembly. Keep bolts, washers, and spacers together in a shallow tray. Clean preparation makes the sharpening work more controlled and reliable.

Sharpen the Cutting Edge Using the Correct Technique

A sharp garden power tool blade cuts cleanly instead of tearing stems or forcing the motor.

Before sharpening, disconnect the power source completely. Remove the battery, unplug the tool, or disconnect the spark plug. Wear eye protection and sturdy gloves. A loose blade can move unexpectedly.

Clean sap and soil with a stiff brush, then inspect the cutting edge under bright light. Do not sharpen cracked, bent, or deeply nicked metal. Replace it. I learned this after spending too long correcting a damaged edge that should have been discarded.

Keep the original bevel angle. Use a flat file for many hedge trimmer teeth, pushing it in one direction along the existing edge. Keep strokes light and consistent. Do not file backward.

For mower blades, clamp the blade firmly and sharpen both sides evenly. A grinder works quickly, but excessive heat can weaken the edge. Stop often and cool the metal before it turns blue. Small adjustments matter.

Check the balance afterward. Place the mower blade on a nail or balancing tool. One side should not drop heavily. An unbalanced blade can cause vibration and damage the machine.

I sometimes remove too much metal while chasing a perfect edge. That is a mistake worth avoiding. Sharpness matters, but preserving the blade’s shape matters more.

Reinstall, Balance, and Test the Blade Safely

Reinstalling a sharpened blade is where careful maintenance can fail. Disconnect the battery or spark-plug wire, remove the ignition key, and wait until every moving part stops. Wear cut-resistant gloves, but never grip the blade edge directly. Clean the spindle, washer, and mounting bolt. Grass packed beneath the washer can create a false sense of tightness. I once dismissed a slight wobble as harmless. It was not.

Balance the blade on a proper cone balancer or a level rod. The heavier side will drop. Remove tiny amounts from the upper surface, then check again. Do not guess with excessive grinding. A bent blade, cracked hub, or damaged bolt needs replacement, not repair. Use the equipment manual’s torque specification, because “tight enough” is not a measurement.

The U.S. Consumer Product Safety Commission estimates roughly 80,000 lawn-mower injuries occur annually, based on National Electronic Injury Surveillance System data.

That figure makes the final test important. Keep people, pets, loose stones, and windows away. Refit every guard before starting. Run the tool briefly at low speed on a clear surface, then stop and inspect for vibration, scraping, or unusual noise. Turn it off before touching anything. Even experienced users can miss a small imbalance.

FAQS

How should I prepare a garden power tool blade before sharpening?

Disconnect every power source completely. Remove the battery or unplug the tool. For petrol equipment, cool the engine and disconnect the spark plug wire. Wear cut-resistant gloves and safety glasses. Photograph the blade before removal. This records its original direction. Use the correct wrench. Place the blade on a wooden workbench, not concrete. Keep bolts, washers, and spacers in a shallow tray.

How do I clean the blade properly?

Brush away grass, sap, and packed soil with a stiff nylon brush. Use a damp cloth for loose dust. For stubborn residue, apply a small amount of suitable degreaser. Follow its safety instructions. Let the blade dry completely. Leftover grit can interfere with filing. Small detail. It matters.

What damage means a blade should not be sharpened?

Inspect the blade under bright light. Look for cracks, deep grooves, bent sections, missing metal, or a damaged hub. Do not sharpen seriously damaged metal. Replace it or seek professional assessment. Cleaning may reveal problems hidden under soil. I sometimes focus too much on sharpness. That is not enough.

Which sharpening method should I use?

Keep the original bevel angle. Use a flat file for many hedge trimmer teeth. Push the file in one direction along the existing edge. Keep strokes light and consistent. Do not file backward. For mower blades, clamp them firmly. Sharpen both sides evenly. Mark one edge with a pencil when both sides look similar.

Can a grinder damage the blade?

Yes. A grinder removes metal quickly and can create excessive heat. Stop often and cool the blade. Do not let the metal turn blue. Blue discoloration may indicate overheating. Small adjustments are safer. I have sometimes removed too much metal while chasing perfection. That was unnecessary.

How can I check whether a mower blade is balanced?

Place the blade on a nail, level rod, or proper cone balancer. The heavier side will drop. Remove tiny amounts from the upper surface. Check the balance again. Do not guess with heavy grinding. An unbalanced blade can cause vibration and machine damage. Sharpness matters, but shape matters too.

How should I reinstall the sharpened blade?

Clean the spindle, washer, and mounting bolt. Remove grass trapped beneath the washer. Refit every guard. Use the equipment manual’s torque specification. “Tight enough” is not precise. Never grip the cutting edge directly. A bent blade, cracked hub, or damaged bolt needs replacement.

How can I test the blade safely after reassembly?

Keep people, pets, loose stones, and windows away. Make sure every moving part has stopped before touching the tool. Start briefly at low speed on a clear surface. Stop and inspect for vibration, scraping, or unusual noise. Turn the tool off before checking anything. If it wobbles, stop there. Do not ignore a small vibration.

Conclusion

Keeping garden power tool blades sharp improves cutting performance, reduces strain on the equipment, and supports safer operation. This guide explains how to sharpen blades of garden power tools by first identifying signs of dullness, such as uneven cuts, torn grass, or increased vibration. Before beginning, gather suitable protective equipment, a cleaning brush, a clamping device, and an appropriate sharpening tool. Disconnect the power source, secure the work area, and follow essential safety precautions throughout the process.

Remove the blade carefully and clean away grass, dirt, and rust so the cutting edge is clearly visible. Sharpen it using the correct angle and steady, consistent strokes, removing only enough material to restore a clean edge. After sharpening, inspect the blade for cracks or damage, then reinstall it securely. Check that it is balanced, tighten all fasteners properly, and perform a cautious test to confirm smooth, stable operation before returning to regular garden work.

Sienna

Sienna

Sienna is a skilled marketing professional with a deep expertise in our company’s core products and services. With a passion for innovation and detail, she plays a pivotal role in crafting insightful blog posts that not only highlight the unique features of our offerings but also provide valuable......